Greetings, dear reader!
Cloud infrastructure is a major trend today, and Amazon Web Services (AWS) is one of the most popular cloud service providers.
In this series of articles, I’ll walk you through how to get your applications up and running on the internet using AWS. Today, we’ll start by building a simple “Hello World” application in Java using Spring Boot. We’ll manually create and configure an EC2 Linux instance in AWS, and deploy our application to it.
This article focuses on environment configuration and deployment. It’s designed for developers who are already familiar with Java but want to learn how to make their applications accessible to the world. To follow along, you’ll need to have Java and Maven installed on your local machine, as well as an AWS account.
Let’s get started!
Create Spring Boot application
Initialize application
To get started, we’ll create a simple Spring Boot project. Go to Spring Initializer page, select Maven as the project type, and choose Spring Web in the dependency list. Once you’re done, hit Generate button. This will download for you a Spring Boot project containing a single class DemoApplication, which is the main entry point for your application.
Add controller
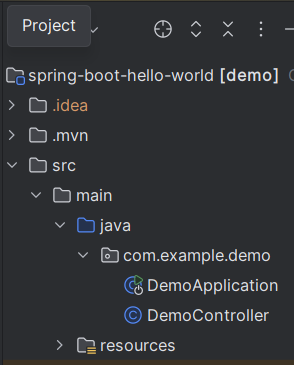
Next, let’s add a controller class that will define an API endpoint and return a simple message: “Hello World from Spring Boot!”. We’ll name the new class DemoController. Here’s what the project structure and the controller should look like:
1
2
3
4
5
6
7
8
9
10
11
12
13
14
package com.example.demo;

import org.springframework.http.ResponseEntity;
import org.springframework.web.bind.annotation.GetMapping;
import org.springframework.web.bind.annotation.RestController;

@RestController
public class DemoController {

  @GetMapping("/message")
  public ResponseEntity<String> getMessage() {
    return ResponseEntity.ok("Hello World from Spring Boot!");
  }
}
This class declares a single method mapped to /message path.
Build application and test locally
Open the terminal and issue the following command
1
mvn clean package
This will package your application into an executable jar and put it into target folder of your project. In my case the jar is called spring-boot-hello-world-0.0.1-SNAPSHOT.jar. You can adjust artifactId and version fields in your pom file to get the jar with the same name if you want.
No application is complete without testing! Let’s verify that everything works by running the application locally. You can start the app either from your IDE or by running the following command in the terminal:
1
java -jar target/spring-boot-hello-world-0.0.1-SNAPSHOT.jar
Now, let’s test the /message endpoint by issuing a curl command:
1
2
~/projects/spring-boot-hello-world> curl localhost:8080/message
Hello World from Spring Boot!
We see that the endpoint has returned our message, as expected.
Well done! Now that we’ve built and tested a simple Spring Boot application, it’s time to deploy it to the cloud. In the next section, we’ll set up an EC2 Linux instance on AWS.
Create EC2 instance
Now, it’s time to set up the infrastructure. Log in to your AWS account and navigate to the AWS Management Console.
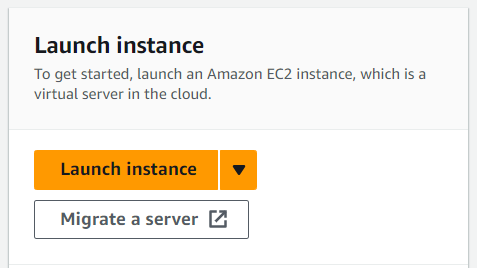
In the search bar at the top, type EC2 and select it from the results. This will open the EC2 Dashboard. Click the Launch Instance button to begin setting up your virtual machine.
Specify instance name and type
A configuration window will open where you can set the parameters for your EC2 instance. Let’s specify the name as aws-ec2-demo-machine (you can use an arbitrary name here). 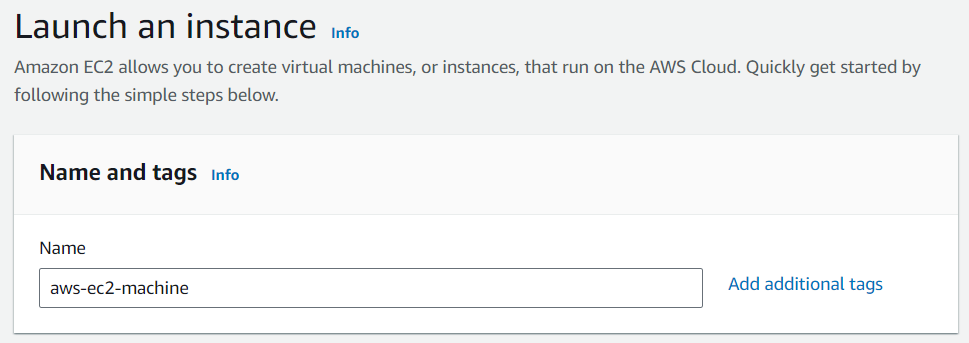
Next, select Amazon Linux in Application and OS Images section
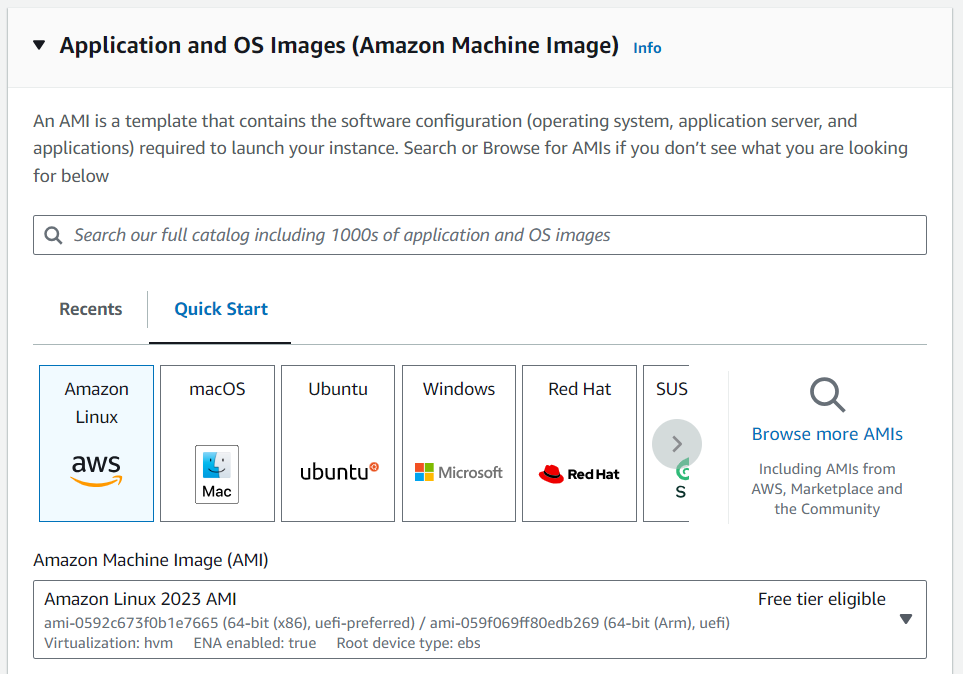
The default option, Amazon Linux 2023 AMI, is perfect for our use case. Under Instance Type we can leave t2.micro as its characteristics are completely enough for our goal.
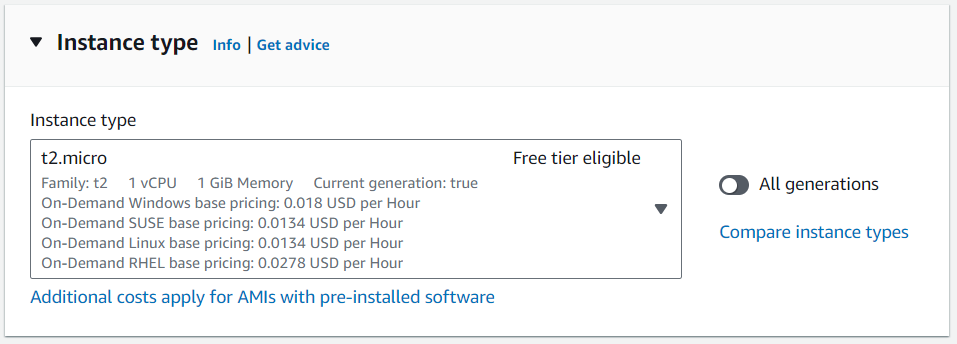
Alright, we told AWS that we want to create a t2.micro machine with Amazon Linux operating system. This machine will have 1 CPU core and 1 GB of RAM.
Create key pair
Apart from having the machine itself, we will need to be able to connect to it later to deploy our application there. This access can be configured in Key pair (login) section.
If you already have a key pair, just select it from the dropdown. Otherwise, hit Create new key pair link on the right.
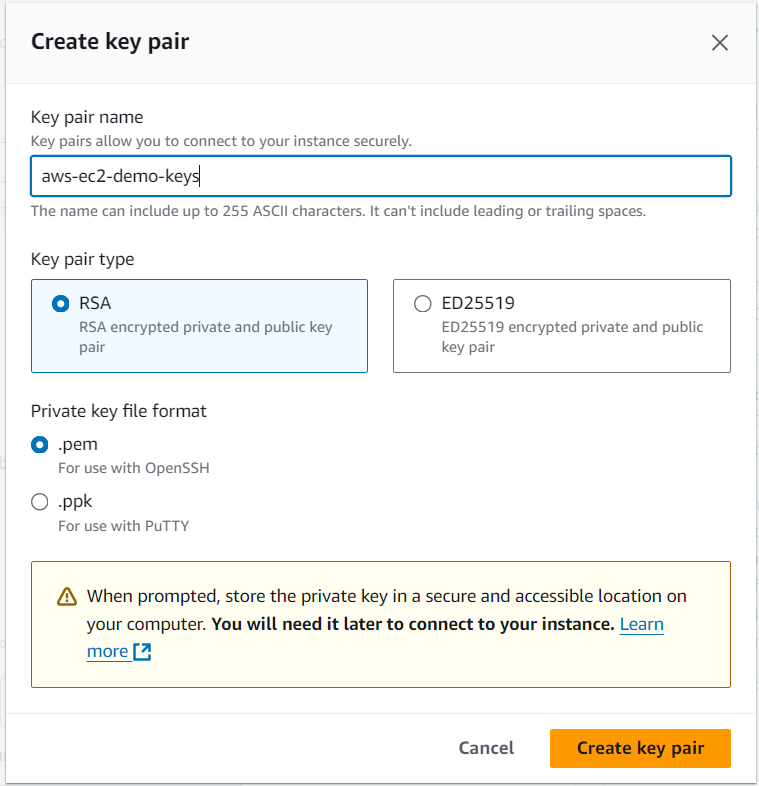
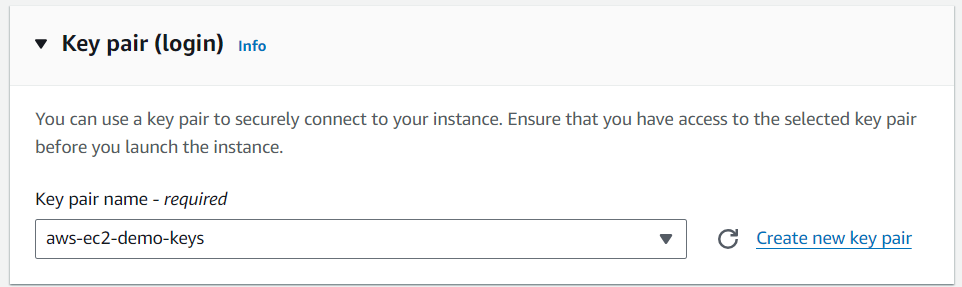
Let’s put aws-ec2-demo-keys as the key pair name and push Create key pair. The key will be downloaded on your local machine. Please make sure that only you have access to it.
Ensure that the new key pair is selected, and let’s move on.
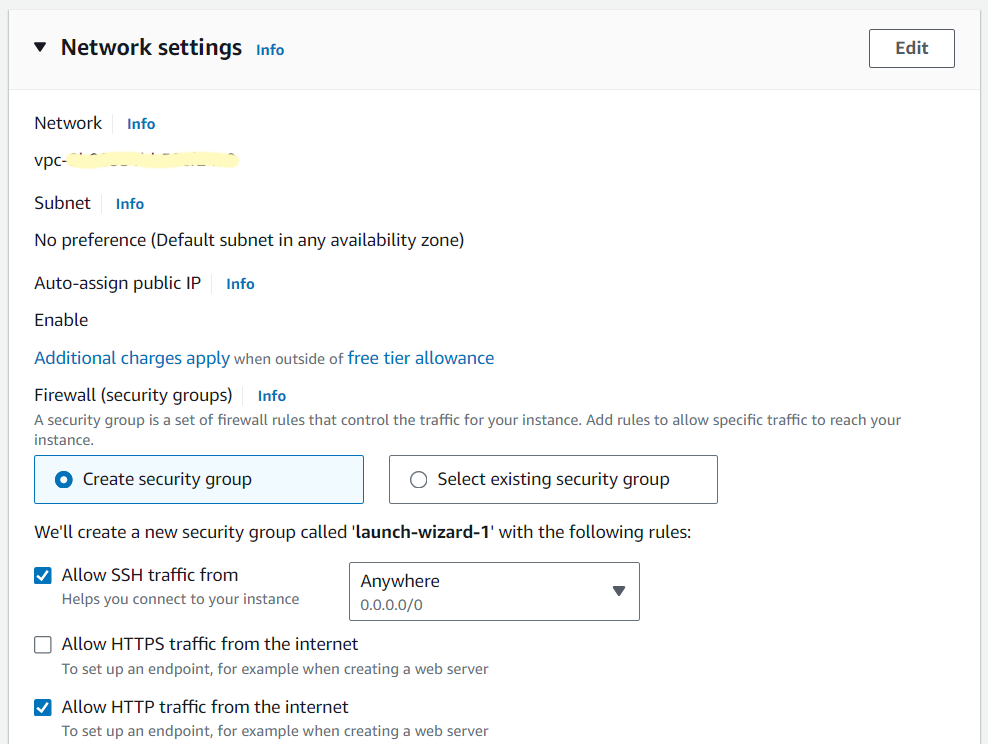
Network configuration
In the Network settings, we can leave the default VPC network chosen. This specifies the part of AWS cloud in which our machine will be running.
In Firewall (security groups) select Create security group. Check Allow SSH traffic from checkbox, and leave Anywhere in the dropdown on the right. Please make sure to narrow down the IP addresses where you allow connection from when you deal with a production application. This is important because helps prevent malicious users from accessing our application. Check Allow HTTP traffic from the internet box as we will want to call out Spring Boot application.
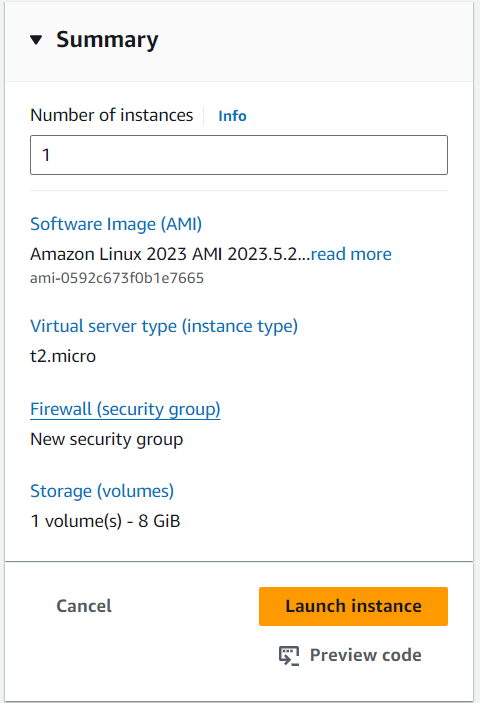
Storage configuration
In Configure storage, we can leave the minimum value of 8 GB, this will be more than sufficient for our simple application.

You can leave Advanced details section with default values.
Run instance
Now review the summary, and, if everything is as expected, hit Launch instance.
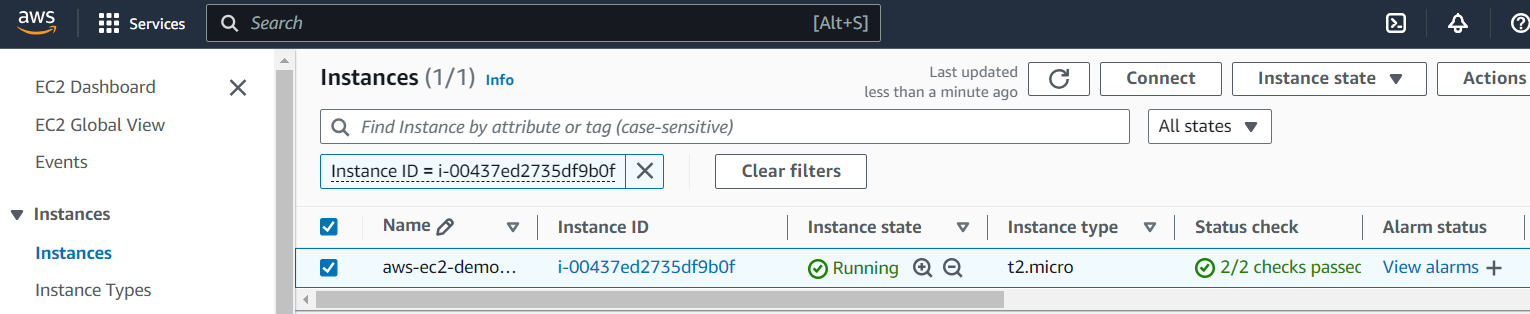
To monitor the instance’s status, return to the EC2 Dashboard and select Instances from the left-hand menu. Wait for the status check to turn green, indicating that the instance is ready.
Check connectivity
Let’s check that we can connect to the machine. We can find the command for it using next the simple steps.
Click on the instance ID, and push Connect button at the top right. When a new page opens, go to SSH client tab and find the command under Connect to your instance using its Public DNS:. Go to the local folder where you store the ssh key and run the command. You should see an output similar to this. Keep in mind that the IP address of the box and its name will be different for you.
1
2
3
4
5
6
7
8
9
10
11
12
~/ssh-keys> ssh -i "aws-ec2-demo-keys.pem" ec2-user@ec2-18-197-58-248.eu-central-1.compute.amazonaws.com
   ,     #_
   ~\_  ####_        Amazon Linux 2023
  ~~  \_#####\
  ~~     \###|
  ~~       \#/ ___   https://aws.amazon.com/linux/amazon-linux-2023
   ~~       V~' '->
    ~~~         /
      ~~._.   _/
         _/ _/
       _/m/'
[ec2-user@ip-172-31-44-26 ~]$
Deploy the application
Now, we have both our app and the box to deploy it to. Let’s proceed with deployment!
The default package manager on Amazon Linux 2023 is DNF. First, we run a command to update any installed packages. It is a good idea to do this so that the box gets the latest software and security patches.
1
sudo dnf update
Next, install Java
1
sudo dnf install java-22-amazon-corretto
and verify the installation
1
2
3
4
[ec2-user@ip-172-31-44-26 ~]$ java -version
openjdk version "22.0.2" 2024-07-16
OpenJDK Runtime Environment Corretto-22.0.2.9.1 (build 22.0.2+9-FR)
OpenJDK 64-Bit Server VM Corretto-22.0.2.9.1 (build 22.0.2+9-FR, mixed mode, sharing)
Java is ready, we can now install our application. Go to the directory with the ssh key on your local machine and run the command to copy our Spring Boot jar to the remote machine.
1
2
~/ssh-keys> scp -i "aws-ec2-demo-keys.pem" ~/projects/spring-boot-hello-world/target/spring-boot-hello-world-0.0.1-SNAPSHOT.jar ec2-user@ec2-18-197-58-248.eu-central-1.compute.amazonaws.com:~/spring-boot-hello-world-0.0.1-SNAPSHOT.jar
spring-boot-hello-world-0.0.1-SNAPSHOT.jar                                                                                                        100%   19MB   4.4MB/s   00:04
Go back to the terminal window connected to the remote host and check if the application was indeed copied. It should be in the home directory of ec2-user.
1
2
[ec2-user@ip-172-31-44-26 ~]$ ls -la /home/ec2-user | grep jar
-rw-r--r--. 1 ec2-user ec2-user 20033114 Oct 14 13:27 spring-boot-hello-world-0.0.1-SNAPSHOT.jar
All good! Let’s start our application similarly to how we did locally.
1
2
3
4
5
6
7
8
9
10
11
12
13
14
15
16
17
18
19
20
[ec2-user@ip-172-31-44-26 ~]$ java -jar /home/ec2-user/spring-boot-hello-world-0.0.1-SNAPSHOT.jar

  .   ____          _            __ _ _
 /\\ / ___'_ __ _ _(_)_ __  __ _ \ \ \ \
( ( )\___ | '_ | '_| | '_ \/ _` | \ \ \ \
 \\/  ___)| |_)| | | | | || (_| |  ) ) ) )
  '  |____| .__|_| |_|_| |_\__, | / / / /
 =========|_|==============|___/=/_/_/_/

 :: Spring Boot ::                (v3.3.4)

2024-10-14T13:30:45.140Z  INFO 30763 --- [demo] [           main] com.example.demo.DemoApplication         : Starting DemoApplication v0.0.1-SNAPSHOT using Java 22.0.2 with PID 30763 (/home/ec2-user/spring-boot-hello-world-0.0.1-SNAPSHOT.jar started by ec2-user in /home/ec2-user)
2024-10-14T13:30:45.142Z  INFO 30763 --- [demo] [           main] com.example.demo.DemoApplication         : No active profile set, falling back to 1 default profile: "default"
2024-10-14T13:30:46.689Z  INFO 30763 --- [demo] [           main] o.s.b.w.embedded.tomcat.TomcatWebServer  : Tomcat initialized with port 8080 (http)
2024-10-14T13:30:46.702Z  INFO 30763 --- [demo] [           main] o.apache.catalina.core.StandardService   : Starting service [Tomcat]
2024-10-14T13:30:46.708Z  INFO 30763 --- [demo] [           main] o.apache.catalina.core.StandardEngine    : Starting Servlet engine: [Apache Tomcat/10.1.30]
2024-10-14T13:30:46.928Z  INFO 30763 --- [demo] [           main] o.a.c.c.C.[Tomcat].[localhost].[/]       : Initializing Spring embedded WebApplicationContext
2024-10-14T13:30:46.930Z  INFO 30763 --- [demo] [           main] w.s.c.ServletWebServerApplicationContext : Root WebApplicationContext: initialization completed in 1699 ms
2024-10-14T13:30:47.757Z  INFO 30763 --- [demo] [           main] o.s.b.w.embedded.tomcat.TomcatWebServer  : Tomcat started on port 8080 (http) with context path '/'
2024-10-14T13:30:47.782Z  INFO 30763 --- [demo] [           main] com.example.demo.DemoApplication         : Started DemoApplication in 3.456 seconds (process running for 4.247)
That might seem like everything is done. But let’s go and call our remote application from the local machine
1
2
3
~/ssh-keys> curl ec2-18-197-58-248.eu-central-1.compute.amazonaws.com:8080/message
curl: (28) Failed to connect to ec2-18-197-58-248.eu-central-1.compute.amazonaws.com port 8080 after 21082 ms: Could not connect to server
Oops! Our app is not reachable from the internet. Can we call it from the Linux box itself? Let’s get back to the remote box and check.
1
2
3
[ec2-user@ip-172-31-44-26 ~]$ curl localhost:8080/message
Hello World from Spring Boot![ec2-user@ip-172-31-44-26 ~]$
What we see is that the application is running, and the port number 8080 is correct. But it is possible to call the application only within the remote box itself.
Let’s check the security group configuration. Navigate to the EC2 instance details page. Scroll down and select Security tab. There will be a link to the security group that we use. Click on it and see which traffic is allowed in the Inbound rules.
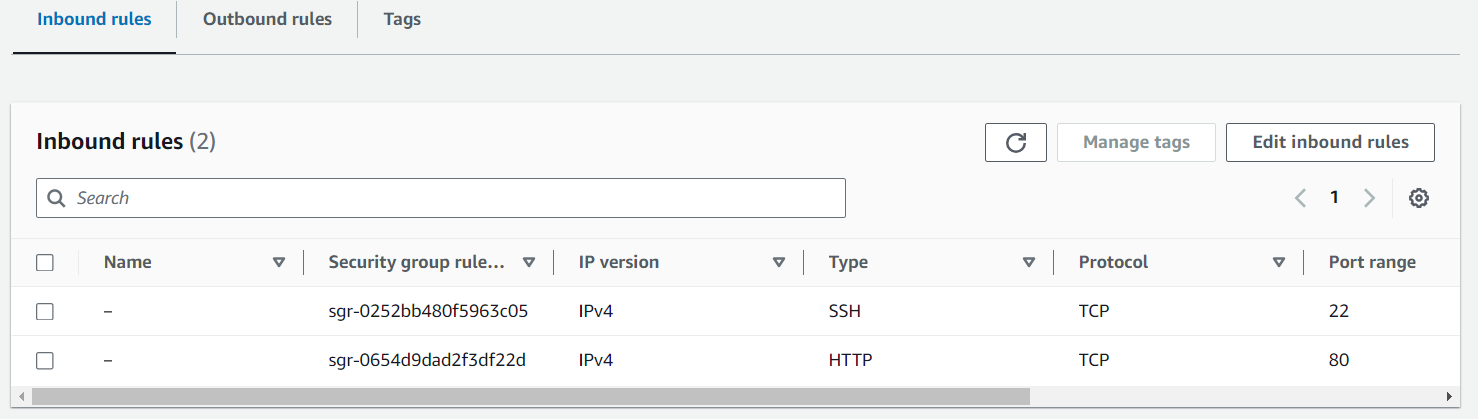
Can you see that the port number for HTTP protocol is 80? This is what was specified by default. We need to change this to the port number which our application is running on. Set the value to 8080. No need to restart the machine. Go to your local terminal and try to call the remote application again.
1
2
~/ssh-keys> curl ec2-18-197-58-248.eu-central-1.compute.amazonaws.com:8080/message
Hello World from Spring Boot!
It worked this time! That’s it. This means it is just the time to send you my congratulations!
Conclusion
Today, we created a simple Spring Boot application with a basic endpoint and deployed it to make it globally accessible. While this task was straightforward, it’s just the first step. There’s so much more you can do! You could deploy a frontend in a similar manner, set up load balancing for clustered applications, or even build a complex microservices architecture in the cloud. The possibilities are vast.
I wish you the best of luck on your journey into coding and infrastructure management. See you in the next article!